
Connect an AI assistant
Once connected, your AI can search for courses, read the material and pick the lesson up where you left off. Progress lives on the server, not in the chat history.
Connector address
https://www.lsystem.app/mcp
In your AI client find where connectors are added (custom connector, MCP server) and paste this address. No keys needed: an L-System page opens where you confirm access with an ordinary sign-in.
- Client settings → “Connectors” → “Add custom connector”.
- Any name, the address above. Leave Client ID and Client Secret empty.
- After saving press “Connect” on the connector: L-System sign-in opens, then the consent page. Allow access and the client comes back connected.
How it works in your client
The steps differ from client to client. The same path reconnects the connector when your assistant stops seeing the tools.
No paid subscription and no config file to edit: Claude — Desktop or in the browser — connects on the free plan, which allows one custom connector. ChatGPT takes custom connectors on paid plans only. Plans checked on 28 August 2026; they are not ours and they change.
I have Claude Desktopworks on the free plan · 5 steps · 4 screenshotschecked 11 August 2026
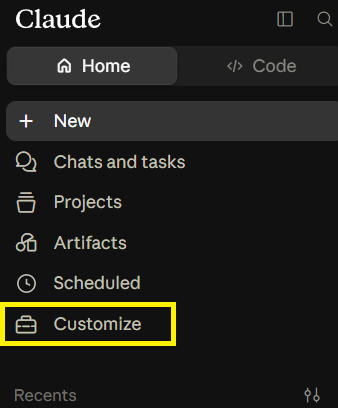
Sidebar → Customize → Connectors.
The free Claude plan allows one custom connector. If yours is already taken, free it up or use another client.
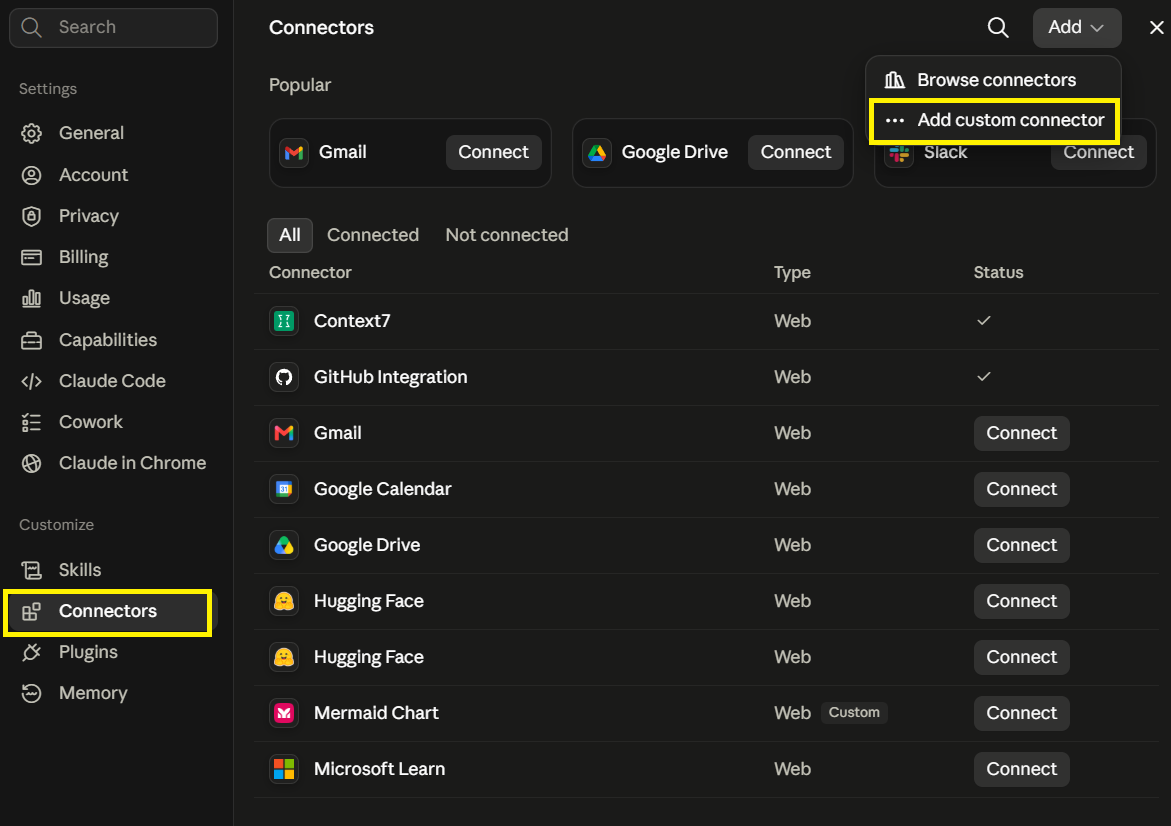
Top right: Add → «Add custom connector».
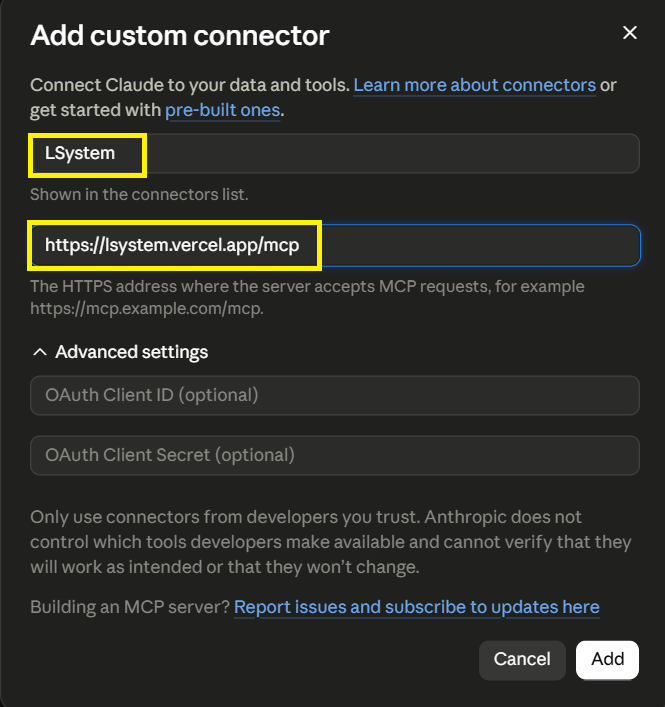
Name — L-System (any name, it is only shown in the list). Address — https://www.lsystem.app/mcp.
Leave OAuth Client ID and Client Secret empty under «Advanced settings»: our server registers the client itself. Press Add.
A sign-in page opens, then a consent screen. Allow access.
Restart Claude Desktop. Until you do, the tool list stays cached and the assistant honestly says it has no such tools.
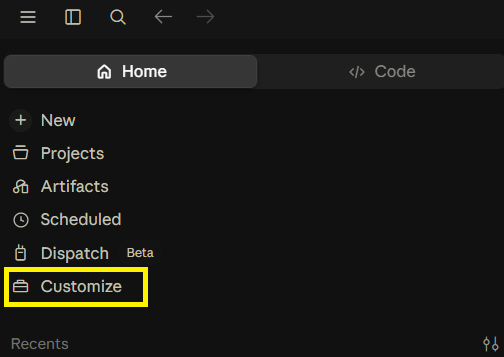
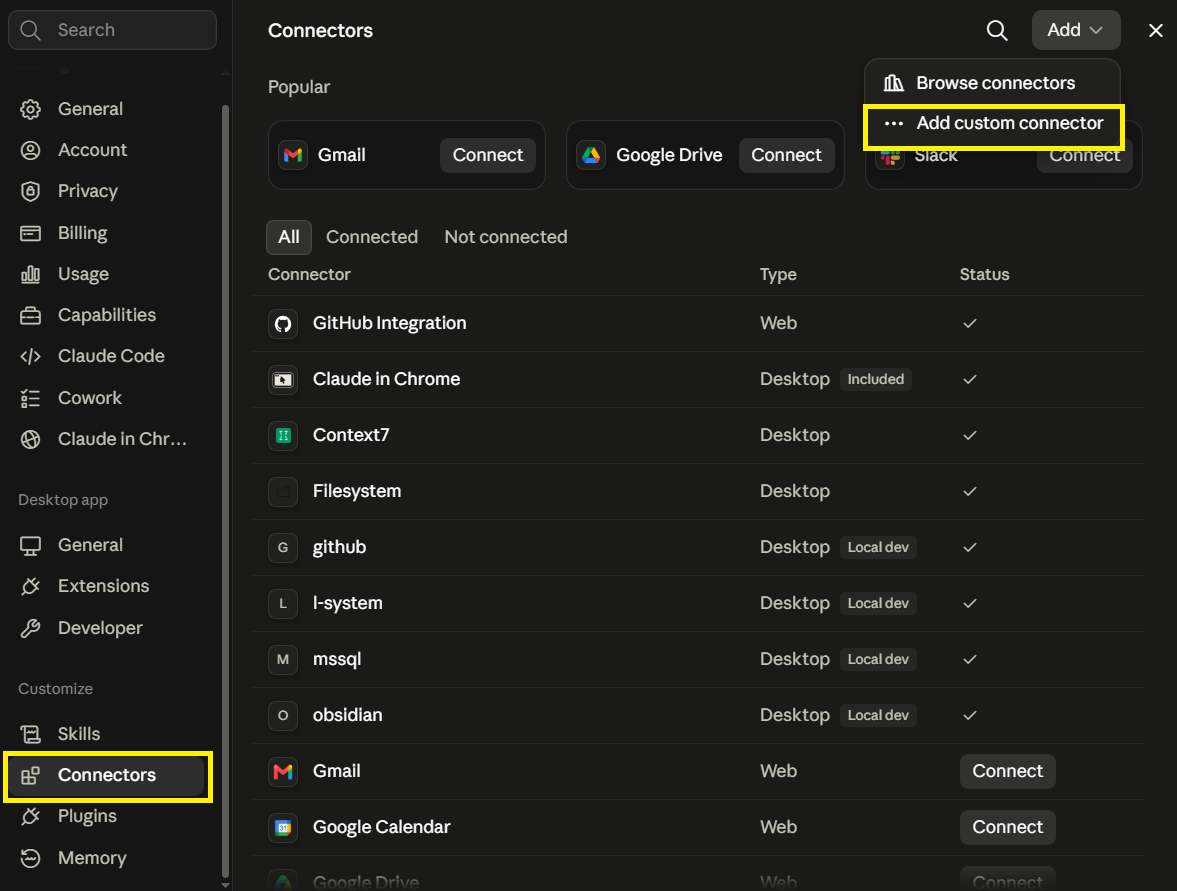
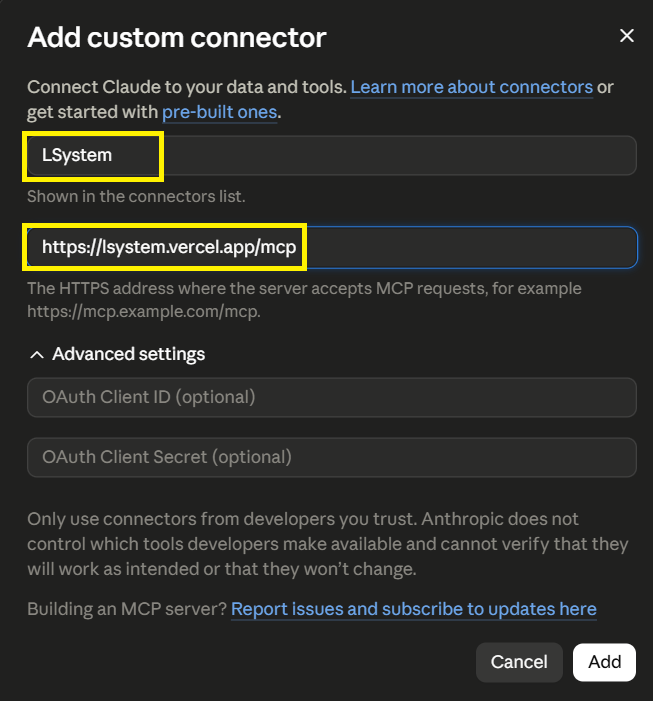
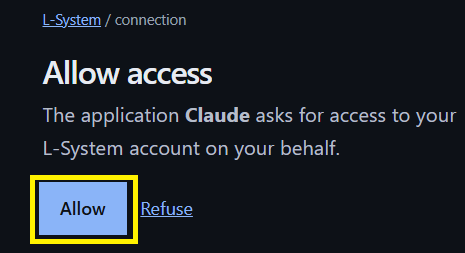
If your screen looks different — tell us, the client has changed.
I have Claude on the webworks on the free plan · 4 steps · 3 screenshotschecked 11 August 2026
Sidebar → Customize → Connectors.
The free Claude plan allows one custom connector. If yours is already taken, free it up or use another client.
Top right: Add → «Add custom connector».
Name — L-System. Address — https://www.lsystem.app/mcp. Client ID and Client Secret stay empty.
Sign in, allow access, then reload the tab.
If your screen looks different — tell us, the client has changed.
I have ChatGPTpaid plan required · 7 steps · 5 screenshotschecked 13 August 2026
A paid ChatGPT plan is required.
On the free plan the Plugins section exists and the app can even be created, but its tools never reach the conversation — the assistant then looks for a plugin by name in the public catalogue and reports plugin_not_found.
Sidebar → «Plugins». Top right: «+».
Name — LSystem. Connection — «Server URL», address https://www.lsystem.app/mcp. Authentication — OAuth. Client ID and Client Secret are not needed: our server registers the client itself.
The icon is optional. Ours is right below — PNG, under 10 KB, the size ChatGPT asks for.
Tick «I understand and want to continue» and press «Create». ChatGPT scans the tools and offers to sign in — «Sign in with LSystem» — and then our consent screen opens.
In a new chat, pick L-System from the tools menu. A developer-mode app is not switched on by itself: without this the assistant sees no tools at all.
Permissions can stay at «allow low-risk actions»: our tools declare their nature, so reading and the ordinary steps of a lesson go through on their own. ChatGPT will ask you before a call that takes something back for good — issuing an exam link, which burns an attempt.
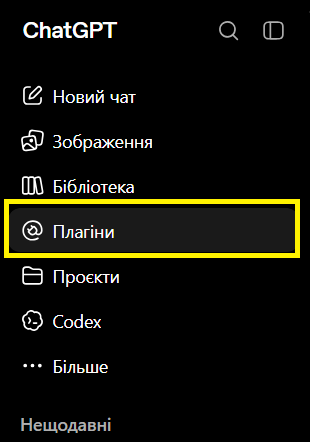
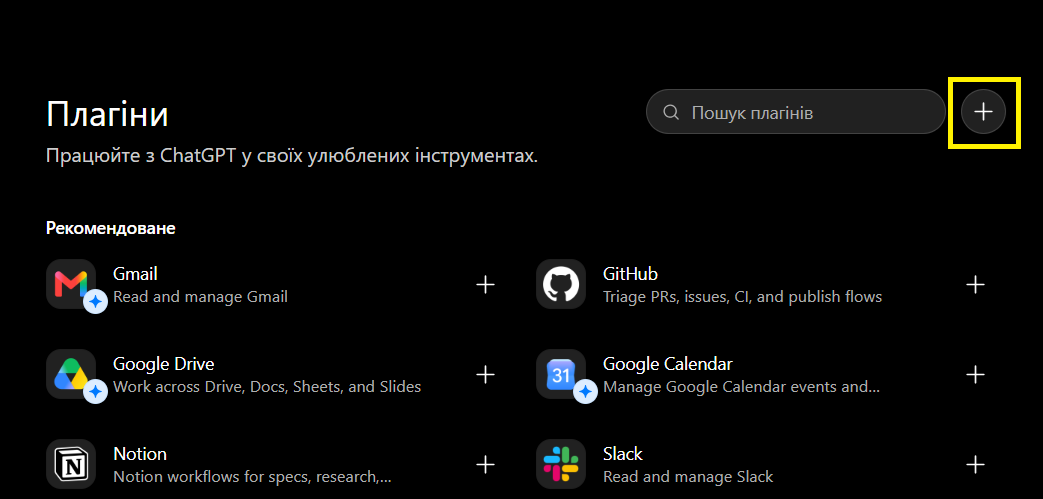
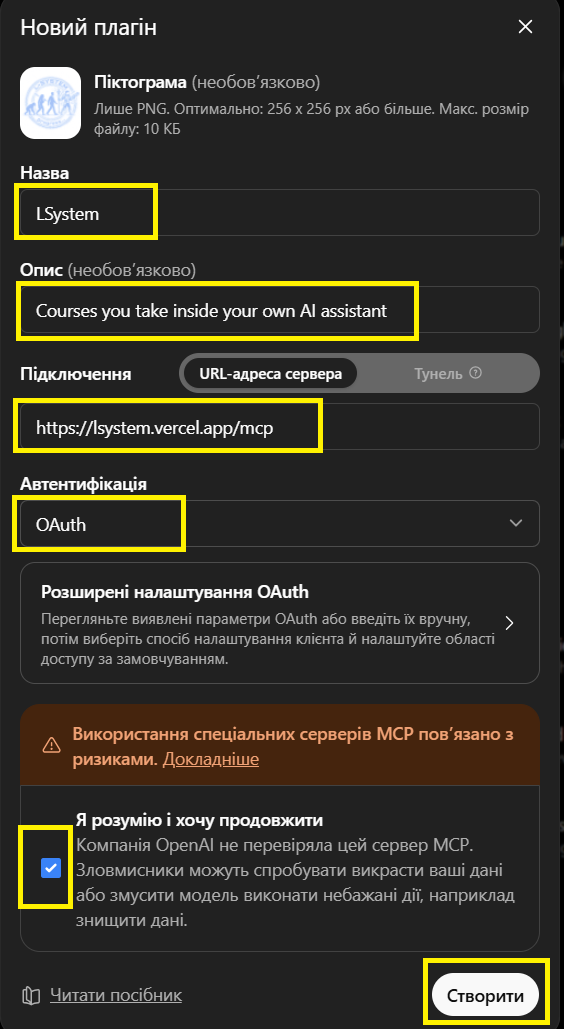
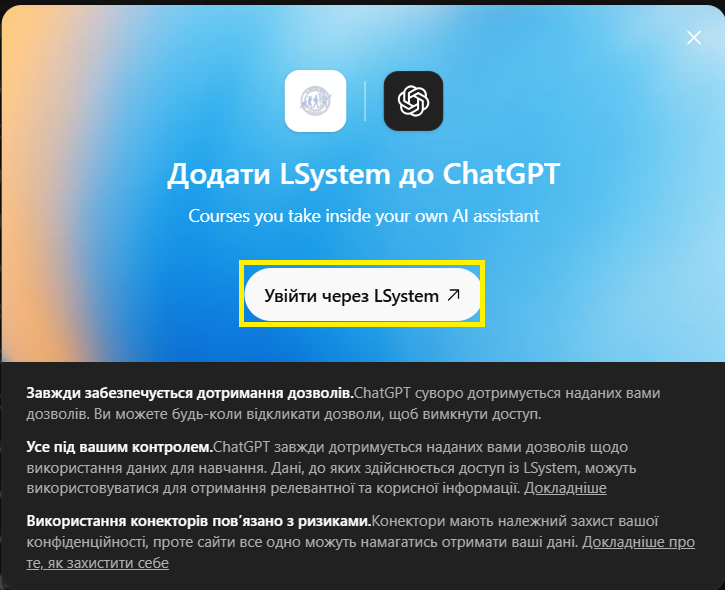
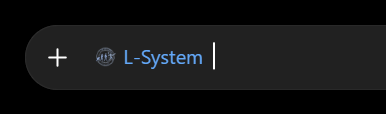
The screenshots were taken with a Ukrainian ChatGPT interface: your button labels will be in your own ChatGPT language, the layout is the same.
If your screen looks different — tell us, the client has changed.
I have Gemini CLIa settings file to edit · 3 steps · 1 screenshotchecked 11 August 2026
Open the settings file and add the mcpServers block below. If the file already has other sections, keep them — add only mcpServers.
The field is httpUrl, not serverUrl: with the wrong name the CLI starts silently and shows no tools.
~/.gemini/settings.json{ "mcpServers": { "LSystem": { "httpUrl": "https://www.lsystem.app/mcp", "authProviderType": "dynamic_discovery", "oauth": { "enabled": true, "scopes": ["learner"] }, "timeout": 30000, "trust": false, "description": "LSystem: каталог курсов, материалы и прогресс. Экзамен сюда не приходит." } } }authProviderType: dynamic_discovery means sign-in happens through our site — no keys and no token in the file.
Restart the CLI. On the first call it opens a browser for sign-in.
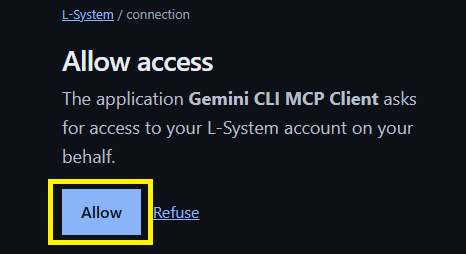
If your screen looks different — tell us, the client has changed.
I have Antigravityworks on the free plan · a settings file to edit · 4 steps · 2 screenshotschecked 11 August 2026
Settings → Customizations → «Installed MCP Servers» → «Open MCP Config».
Add the block below.
Here the field is serverUrl — Antigravity names it differently from Gemini CLI. With the wrong name the client starts silently and shows no tools.
~/.gemini/config/mcp_config.json{ "mcpServers": { "LSystem": { "serverUrl": "https://www.lsystem.app/mcp", "authProviderType": "dynamic_discovery", "oauth": { "enabled": true, "scopes": ["learner"] }, "timeout": 30000, "trust": false } } }Sign-in goes through our site: no token in the file. If your build of the client does not understand dynamic_discovery yet, use the token fallback described under these tabs.
Restart the client and allow access in the browser window that opens. The connector list should show the tools; their number is a good sanity check.
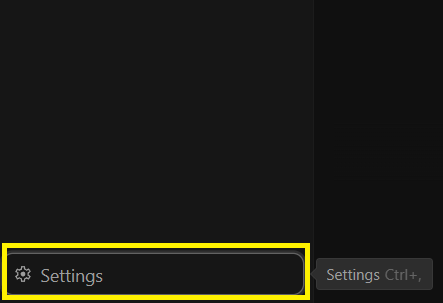
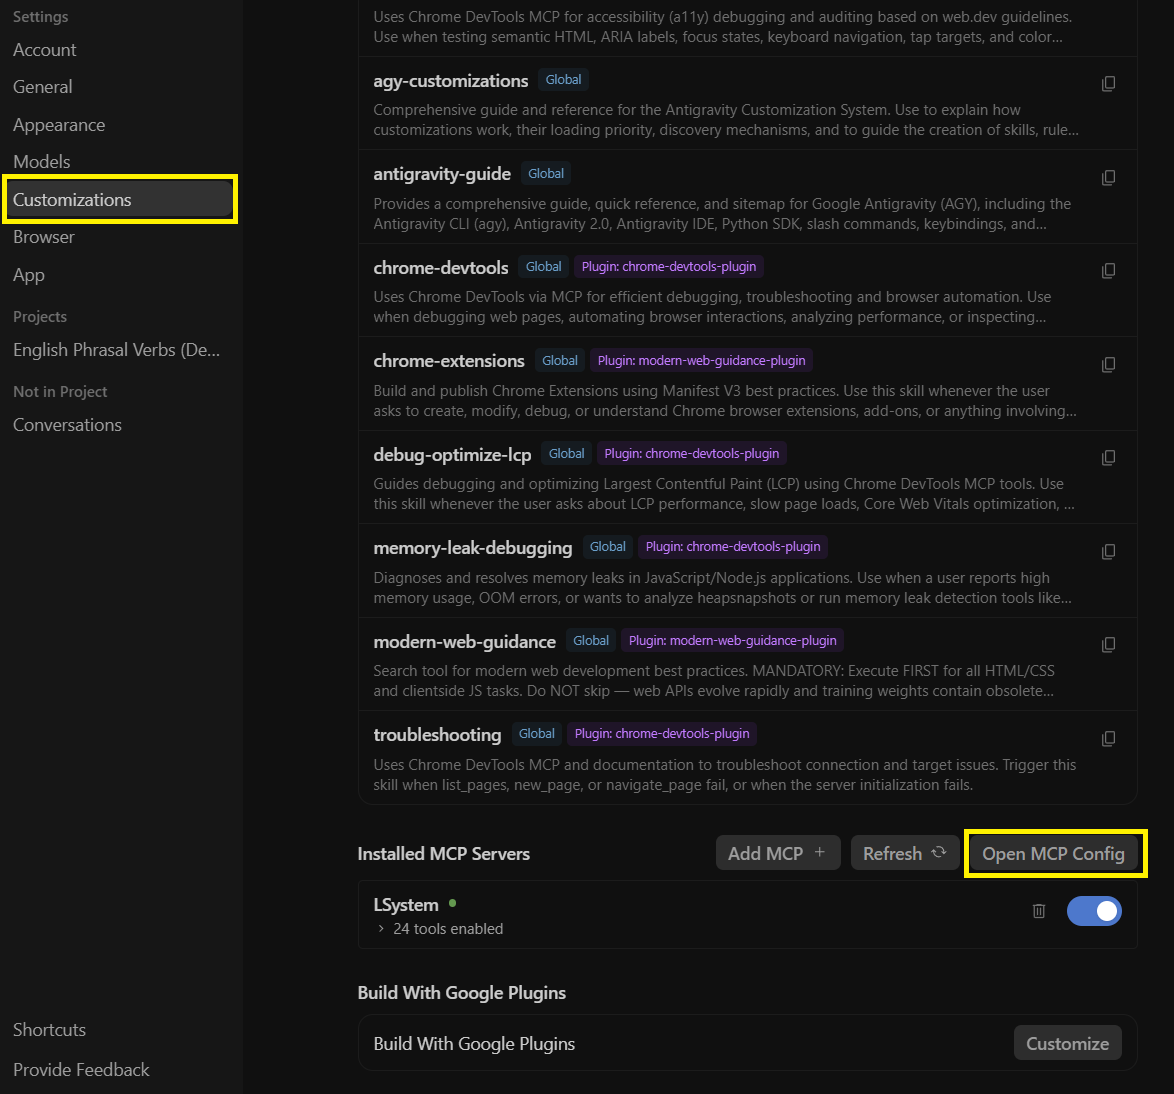

If your screen looks different — tell us, the client has changed.
Another client? Any assistant that can add a custom MCP connector will do: it needs the address above, and nothing else.
A client without OAuth connects with a personal token — the path exists, and it has a price. How the fallback works
Tell it how to teach you
Form of delivery, look, pace — set once on the site and your assistant picks them up on connection. Otherwise you would explain the same thing every session.
If something is not working
- The login window opened, access was granted — and your assistant has no tools
- The most common failure. Clients cache the tool list, so after we ship your assistant honestly sees no new ones. Disconnect the connector and add it again — or restart the client.
- The login window never opened
- Your client could not find our sign-in page. There is nothing to fix on your side — meanwhile there is a fallback. How to connect with a personal token · write to us: andreykuralekh@gmail.com
- It used to work and now it does not
- Most likely the access has expired. Revoke the access in your profile and connect again
What the assistant will be able to do
Will do on your behalf
- enrol you on a course — with your confirmation
- keep your progress: current unit, what is done, points
Will know
- search the catalogue and open course descriptions
- read unit material and the author’s teaching notes
What it will not get
Exam questions and answers. They never travel through the connector — not to this client, not to any other: the exam runs in the browser, past the AI, or the certificate would mean nothing.
- Other people’s courses. The client sees the published catalog and your own enrolments; other authors’ private courses and drafts stay out of reach.
- Your learning settings. The assistant reads them but cannot change them: theme, pace, format and language are edited here, on the site.
If your client cannot sign in through the site
A personal token is created in your profile and sent as the Authorization: Bearer … header. The connector address is the same one used for sign-in through the site.
Clients that accept headers in the settings file
The field name differs between clients: Gemini CLI calls it httpUrl, Antigravity calls it serverUrl; the per-client walkthrough is above on this page.
{
  "mcpServers": {
    "LSystem": {
      "httpUrl": "https://www.lsystem.app/mcp",
      "headers": {
        "Authorization": "Bearer lst_YOUR_TOKEN"
      },
      "timeout": 30000,
      "trust": false
    }
  }
}Clients that do not accept headers
Claude Desktop does not understand headers in the settings file: it expects a program to launch. A bridge passes the header instead — install it with npm install -g mcp-remote. Write the colon after Authorization with no space: with a space Windows splits the argument in two and the header arrives empty. On Windows put the full path to mcp-remote.cmd in the command field.
{
  "mcpServers": {
    "LSystem": {
      "command": "mcp-remote",
      "args": ["https://www.lsystem.app/mcp", "--header", "Authorization:${LS_TOKEN}"],
      "env": { "LS_TOKEN": "Bearer lst_YOUR_TOKEN" }
    }
  }
}The price is the same either way: the token sits in a file in plain text, and it can only be revoked by hand, in your profile. Take this path only when sign-in through the site is unavailable.
Granted access is listed in your profile, and can be revoked there.